
Your wedding bouquet is more than just flowers—it’s a memory, a symbol of one of the most important days of your life. After the music fades and the guests go home, you might be wondering: how can I preserve my wedding bouquet and keep the magic alive forever?
In this guide, we’ll walk you through several DIY bouquet preservation methods, explain the pros and cons of each, and offer expert tips to help you choose the best option. Whether you’re a DIY bride or someone just curious about the process, you’ll find everything you need right here.
Why Preserve Your Wedding Bouquet?
Before we dive into the how, let’s talk about the why.
- Sentimental Value: The bouquet you held walking down the aisle is one-of-a-kind. Preserving it keeps those emotions intact.
- Heirloom Potential: A preserved bouquet can be passed down to future generations or incorporated into future events.
- Unique Home Décor: Preserved florals can be framed, displayed in shadow boxes, or turned into beautiful keepsakes.
Now let’s explore your options!
1. Air Drying Your Wedding Bouquet
One of the simplest and most affordable methods, air drying requires minimal tools and works best with sturdy flowers like roses, lavender, and eucalyptus.
How to Do It:
- Remove excess greenery and dead petals.
- Tie the bouquet stems together tightly with twine or a rubber band.
- Hang the bouquet upside down in a cool, dry, and dark place (like a closet).
- Leave it for 2-4 weeks until completely dry.
Pros:
- Budget-friendly
- Easy and accessible
- Keeps most of the bouquet intact
Cons:
- Flowers become brittle
- Colors may fade or yellow over time
Pro Tip: Light misting with hairspray after drying can help reduce fragility.
2. Pressing Wedding Flowers
Pressing is ideal for turning your bouquet into art, especially if you want to frame it later.
How to Do It:
- Select a few of your favorite flowers (not the whole bouquet).
- Place the flowers between two pieces of parchment paper.
- Insert them inside a heavy book and close it.
- Add more books or weight on top.
- Leave them for 2-3 weeks.
Pros:
- Great for wall art
- Preserves color better than drying
- Easy to DIY with common household items
Cons:
- Not suitable for entire bouquets
- Flowers become flat (can’t reshape)
Creative Idea: Arrange the pressed flowers in a glass frame with your wedding date and vows for a gorgeous display piece.
3. Using Silica Gel for Drying
Silica gel is a desiccant (drying agent) that helps preserve flowers with better color and shape retention compared to air drying.
How to Do It:
- Purchase silica gel (available at most craft stores or online).
- Fill a plastic container with a layer of silica gel.
- Gently place your flowers in the gel, then slowly pour more silica over them until completely covered.
- Seal the container and leave it for 1-2 weeks.
- Carefully remove the flowers and dust off excess gel.
Pros:
- Best DIY method for color and shape
- Preserves flower integrity
- Great for delicate flowers like peonies and orchids
Cons:
- Requires special materials
- Takes a steady hand and patience
Note: Always wear gloves and a mask when working with silica gel to avoid irritation.
4. Epoxy Resin Preservation
For those who love unique home décor, preserving your bouquet in resin can turn your flowers into a functional art piece like coasters, jewelry, or paperweights.
How to Do It:
- Dry your flowers first (air dry or silica gel).
- Arrange them in a silicone mold.
- Mix epoxy resin according to package instructions.
- Pour resin over the flowers and let cure for 24–48 hours.
- Remove from mold and sand edges if needed.
Pros:
- Creative and long-lasting
- Endless customization options
- Makes great gifts and keepsakes
Cons:
- Requires drying in advance
- Resin can be tricky and requires good ventilation
5. Freeze-Drying (Professional Option)
If you want museum-quality preservation, freeze-drying is the best option—but it’s not DIY.
Process:
A professional florist or preservation service uses a freeze-drying machine to remove moisture while keeping the shape and color of the flowers nearly identical to the original.
Pros:
- Best long-term preservation
- Flowers look fresh forever
- Ideal for sentimental brides
Cons:
- Expensive
- Not DIY—must be done by a professional
- Takes a few weeks to complete
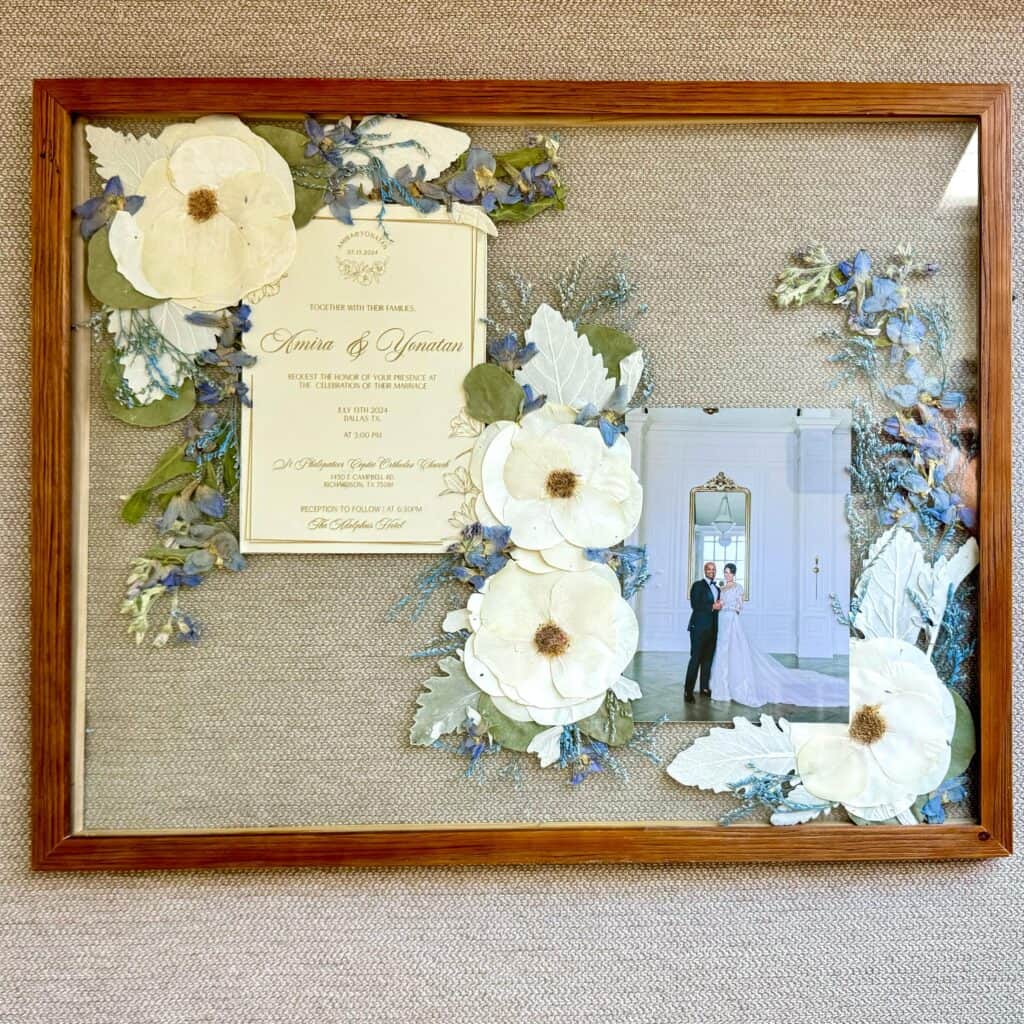
Bonus: Create a Bouquet Shadow Box
Once your flowers are preserved, display them proudly!
What You’ll Need:
- Shadow box frame
- Your preserved flowers
- Optional: ribbon, wedding photo, invitation card
Arrange your flowers inside the frame, add mementos, and hang it on your wall. It’s a beautiful way to keep the romance alive and celebrate your love story.
Things to Keep in Mind
- Start ASAP: Don’t wait too long after the wedding. Flowers begin to wilt quickly.
- Choose the Right Flowers: Some flowers preserve better than others (roses, carnations, eucalyptus, lavender).
- Test a Few Methods: If you’re unsure, try preserving a few blooms using different techniques before committing.
Common Questions About Bouquet Preservation
How long does a preserved wedding bouquet last?
Depending on the method, it can last anywhere from a few years to a lifetime (resin or freeze-dried bouquets tend to last longest).
Can I preserve a bouquet that’s already wilted?
It’s possible, but the results may not be as vibrant. Drying or pressing can still salvage some beauty.
Should I preserve the whole bouquet or just part of it?
That’s entirely up to you. Some brides preserve just a few symbolic flowers, while others keep the entire arrangement.
Key Takeaways for Wedding Bouquet Preservation
Preserving your wedding bouquet is a beautiful way to keep the magic of your special day alive for years to come. Whether you go for air drying, pressing, silica gel, or even resin art, there’s a method for every style and budget.
If you’re looking for ready-to-display preserved floral art or need help bringing your vision to life, check out Preserve Bouquet—where we turn your wedding day memories into timeless keepsakes.